• Follow us on Twitter @buckeyeplanet and @bp_recruiting, like us on Facebook! Enjoy a post or article, recommend it to others! BP is only as strong as its community, and we only promote by word of mouth, so share away!
  • Consider registering! Fewer and higher quality ads, no emails you don't want, access to all the forums, download game torrents, private messages, polls, Sportsbook, etc. Even if you just want to lurk, there are a lot of good reasons to register!

Home Repairs/HoneyDo List/Advice & Tips/etc.

Well, I am using it as a gap filler to attach a retaining wall I built out of treated 4x4's. I just want to give the retaining wall some additional support. View attachment 13394 View attachment 13395

How deep did you take that retaining wall? Just asking as if in Ohio I see a lot of people not take it past the frost line which is pretty deep and those suckers go down pretty quick!

*Also - in a perfect world you'll find someone with a hammer drill, get expansion fasteners and never have to worry about it again.
 
Upvote 0
How deep did you take that retaining wall? Just asking as if in Ohio I see a lot of people not take it past the frost line which is pretty deep and those suckers go down pretty quick!

*Also - in a perfect world you'll find someone with a hammer drill, get expansion fasteners and never have to worry about it again.
That is the thing, I can't dig it down in due to the electric and gas services coming in right in that area. It is too risky for me to dig. I will have another wall coming in to the other side that I hope will help support this one as well.
 
Upvote 0
That is the thing, I can't dig it down in due to the electric and gas services coming in right in that area. It is too risky for me to dig. I will have another wall coming in to the other side that I hope will help support this one as well.

Good thinking - if your limited with depth having a cross brace will help. If on the far end of that other wall acting as a brace you are far enough to go deeper, try to anchor that sucker below the line at least.
 
Upvote 0
@buckeyebri

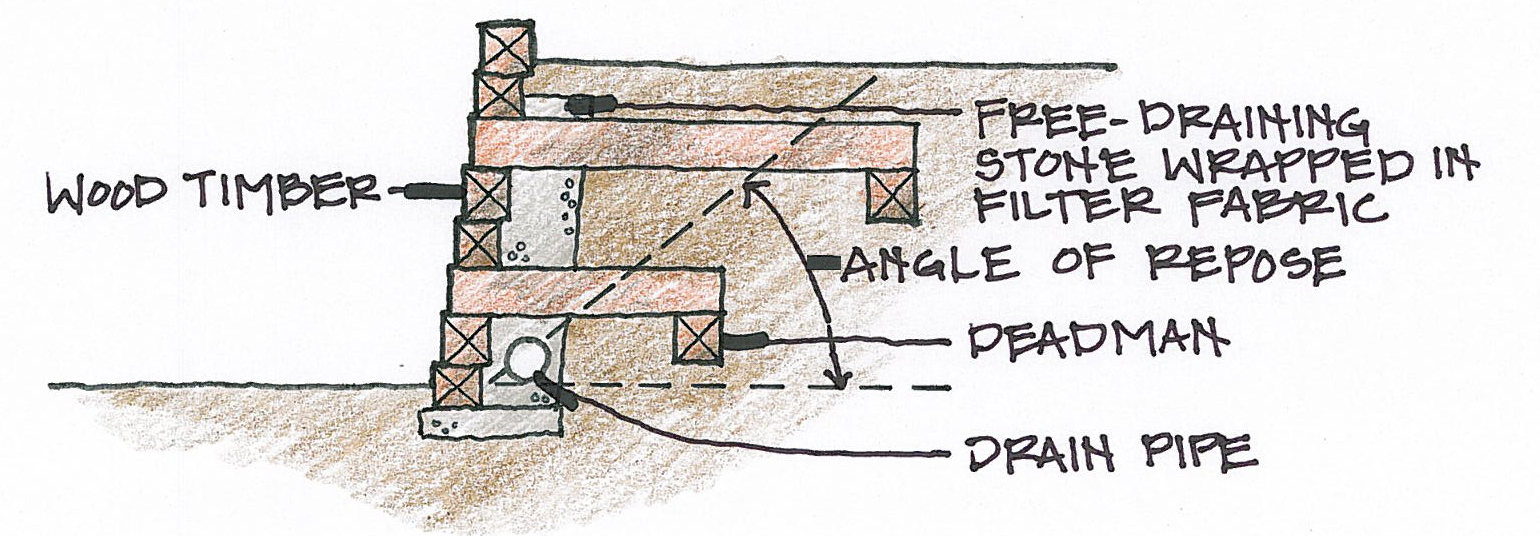
Did you install deadmen or in some way reinforce that wall into the retained soil, or is just a stack of treated 4x4s fastened together?

I'd be a little concerned about fastening to the masonry wall as the earth pressure exerted on the new retaining wall could be great enough to displace the existing masonry...

Source: I'm a geotechnical engineer

edit:

wood+timber+wall.jpg
Thanks FCollins, I appreciate this sketch. I am going to take a look at what I've got going on base on what you sent here. I am definitely concerned about the drainage coming in behind and was thinking of how to eliminate that. I have done enough Civil Engineering to be slightly dangerous. I've got a Civil and an LA coming over this weekend and I was going to have them look at it as well.
 
Upvote 0
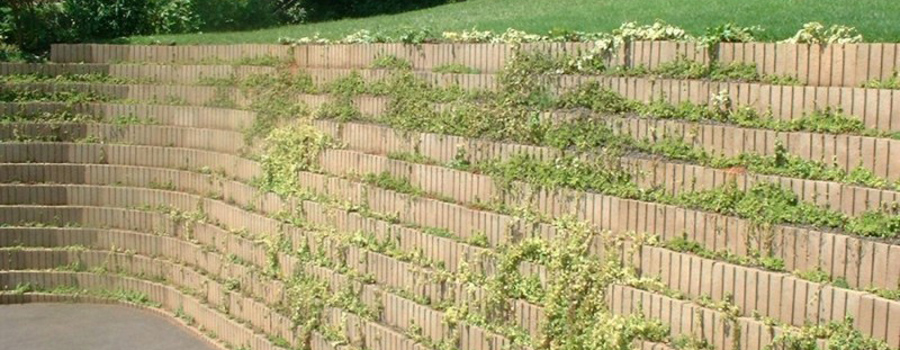
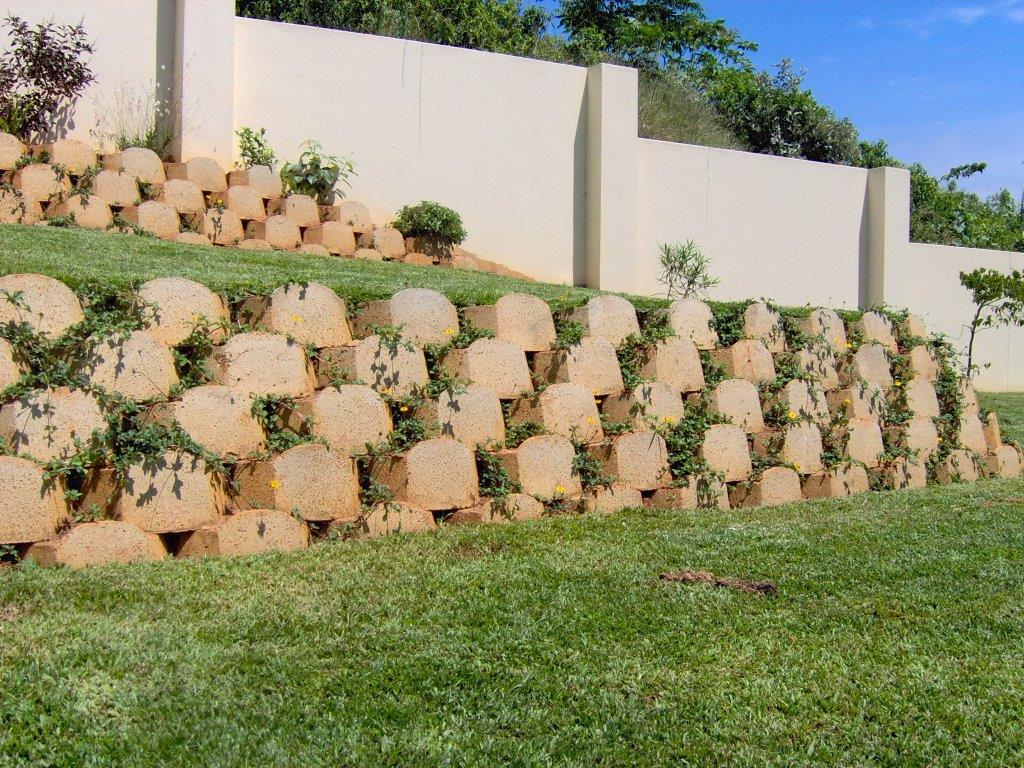
The South African approach traditionally is to use retaining wall blocks. I have used them even with sandy soil and dunes and it worked very well. The blocks are placed and filled with soil. The next layer is then placed and so on. It's cheaper, allows for some movement, and there's no cracking. Plants can be placed in the open spaces to make quite a stunning wall. I built one in Cape Town that was 5 or 6 meters high in dune sand. It is still where we put it!


4ee2440c8c684710b985fd7085dfca8b.jpg
Retaining-wall.jpg
DSC_9428.jpg

RETAINING-WALL.jpg
 
Upvote 0
Settled on our new house on the 17th and have been doing some work in the kitchen.....painted the walls, cabinets (Rustoleum Cabinet Transformation Kit), put up a backsplash & used a Giani Granite kit to redo the countertops. Painting the countertops was a little intimidating at first, but once I got the technique down, it was pretty easy. Very happy with the results......

Before & After (cabinet hardware & new appliances coming at some point):

IMG_2939.jpg


Closeup of countertops (prior to applying top clear coat):

IMG_4923.jpg


Kick ass table my father-in-law & his brother made for us:

IMG_2573.jpg

IMG_5287.jpg
Very well done.

Looks great!
 
Upvote 0
Finally figured out exactly how the damn frogs and some large bugs were getting onto the patio, the cutouts for drainage. Turns out the bright people installing the screen and railing decided to just cut the screen to match the drainage cutouts at the base of the railing, on both sides, instead of bringing the screen down over the cutout and securing it. Now I have to figure out the best way to put on one of those screen patches and secure it without blocking the flow of water while making sure it isn't just an easy to push flap that becomes the equivalent of a dog door for frogs. Thinking I'll just use some liquid adhesive and leave a small gap of like three squares in the middle without the adhesive for water to still get out (even when it gets crazy bad there's hardly any actual water to drain out, so even that small of a gap should be more than enough).
 
Upvote 0
Settled on our new house on the 17th and have been doing some work in the kitchen.....painted the walls, cabinets (Rustoleum Cabinet Transformation Kit), put up a backsplash & used a Giani Granite kit to redo the countertops. Painting the countertops was a little intimidating at first, but once I got the technique down, it was pretty easy. Very happy with the results......

Before & After (cabinet hardware & new appliances coming at some point):

IMG_2939.jpg


Closeup of countertops (prior to applying top clear coat):

IMG_4923.jpg


Kick ass table my father-in-law & his brother made for us:

IMG_2573.jpg

IMG_5287.jpg
I've been sitting on a Giani granite kit for over a year now....just because I don't want it to turn out stupid.
 
Upvote 0
Back
Top